Creating Dashboards
Visualize all of your data with dashboards
Dashboards let you put multiple queries on one page so you can see your key metrics at a glance. The queries on a dashboard can be table results, or charts. Free and Premium plans allow for 2 dashboards while Business and Enterprise feature an unlimited amount of dashboards.
How to create a dashboard
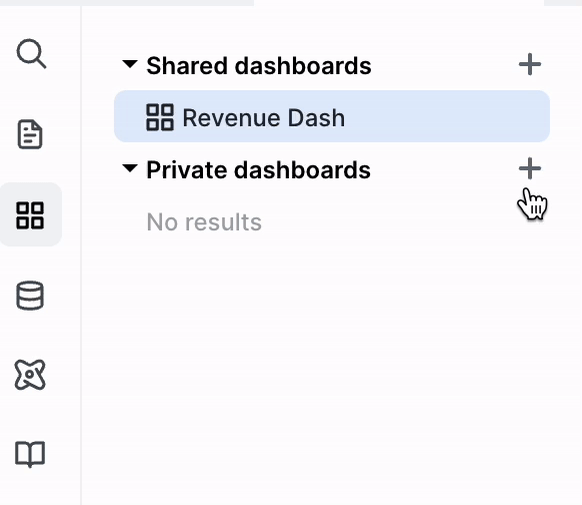
On the left side of the app, under the dashboard tab (four squares) look for the plus signs. From there, you can create a new private or shared dashboard.
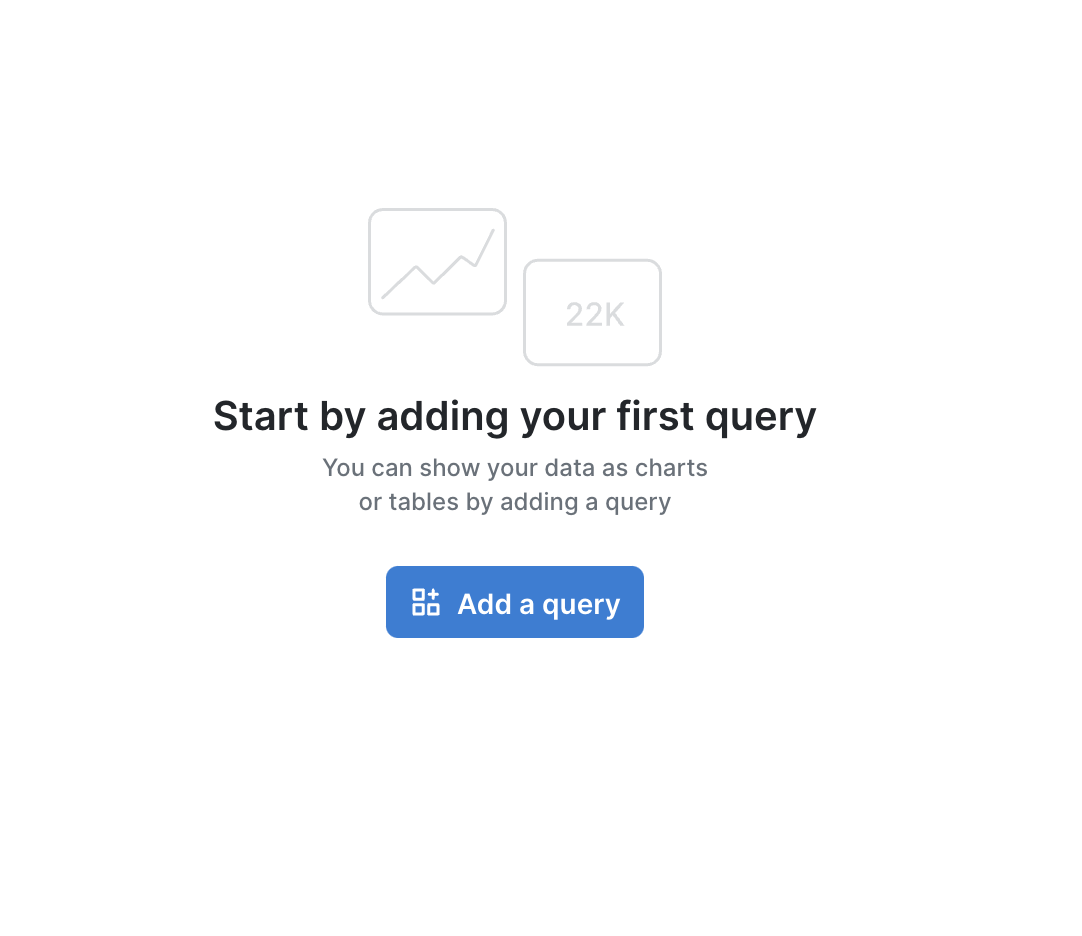
Adding a query to a dashboard
Now that the dashboard has been created, you can add queries from the button in the middle of the dashboard. Alternatively, you can add queries from the query page by clicking the dashboard icon under the title and searching for the name of the dashboard.
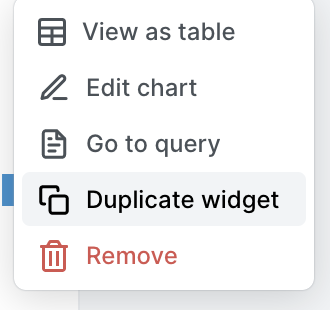
To remove a widget from a dashboard, click the three dots in the top right of the widget and select Remove.
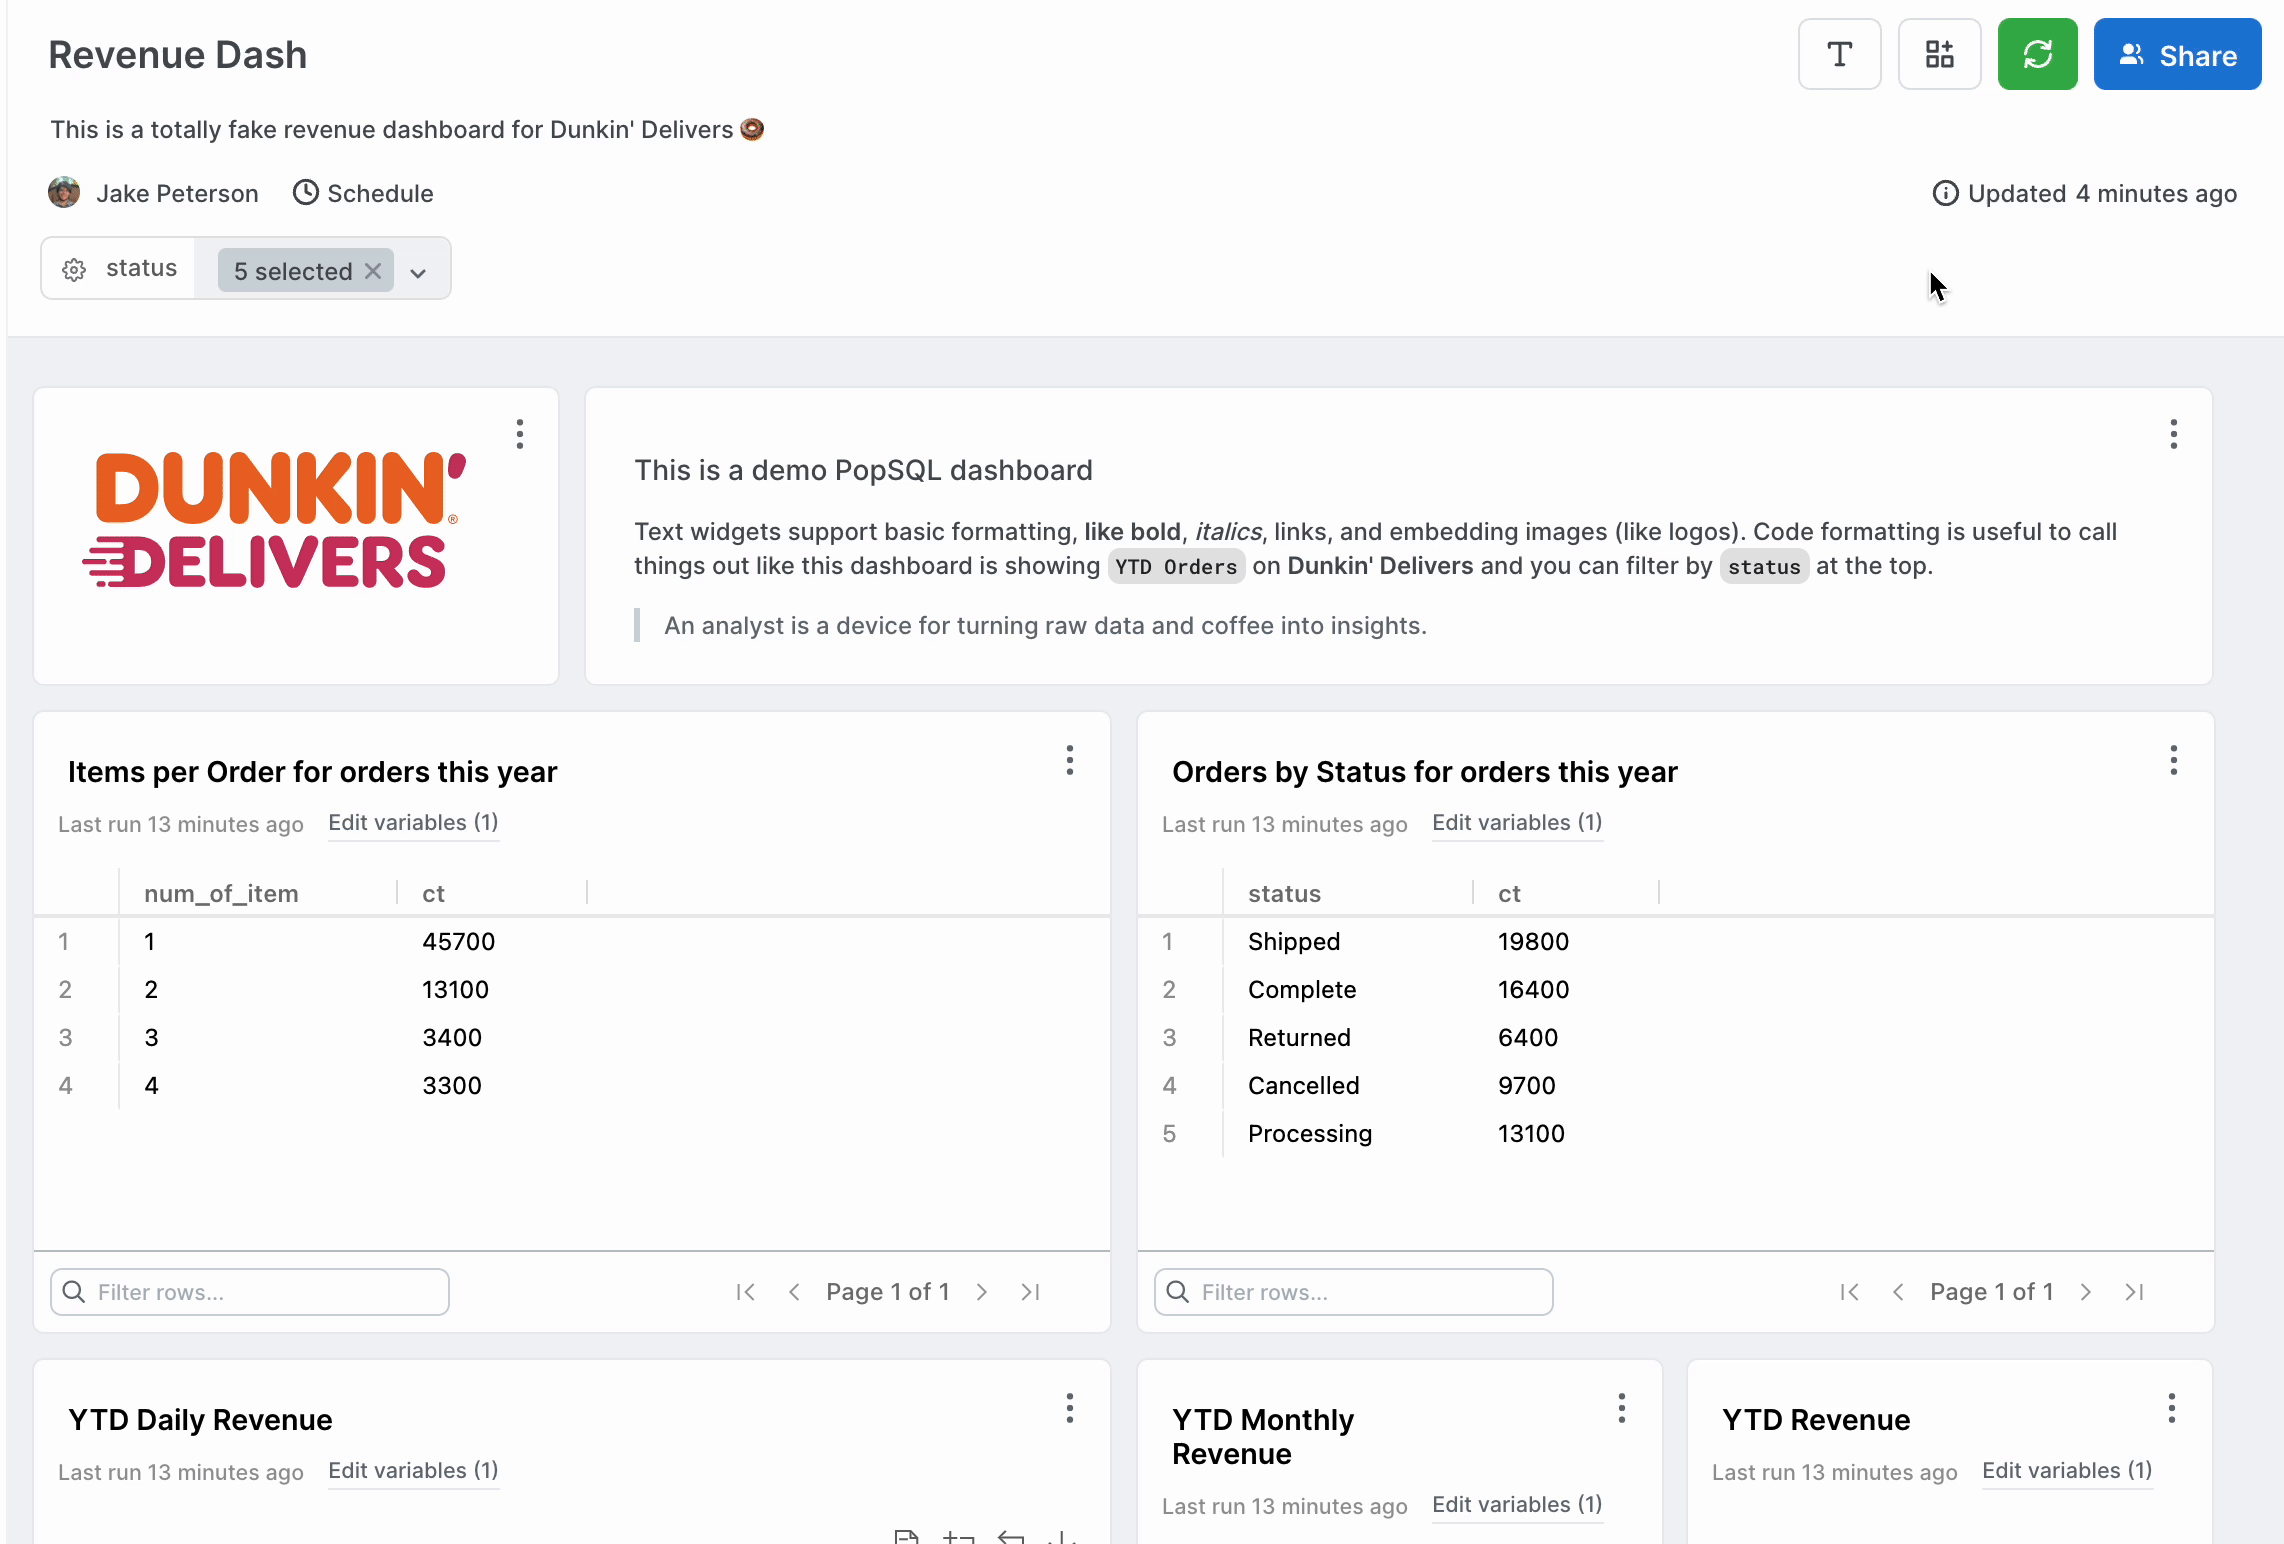
Adding multiple charts from a single query
Say you have one query that has a lot of valuable information that you'd like to chart in different ways. As many charts as you need can be added to the dashboard from the same query. There are a few ways of doing this:
- Duplicate the widget after you've created one chart and added it to the dashboard. On the new duplicate you can edit the chart and the title to reflect the new information. Repeat as many times as is necessary.
Edit the chart on the query page and add the new chart to a dashboard. Once your first chart is added to the dashboard, you can go back to the query results page where you created the chart. Using the same results, you can update the chart to the new version, then add that to the dashboard as well. Remember to rename the chart so you keep track of what you're looking at.
Note: when you have multiple widgets in a dashboard that are coming from a single query, refreshing the dashboard will only require the query to run once.
Using query variables with a dashboard
If any of the queries on your dashboard have variables, you'll see a list of variables and their values underneath the dashboard name. These values will be shared among every query that uses that respective variable.
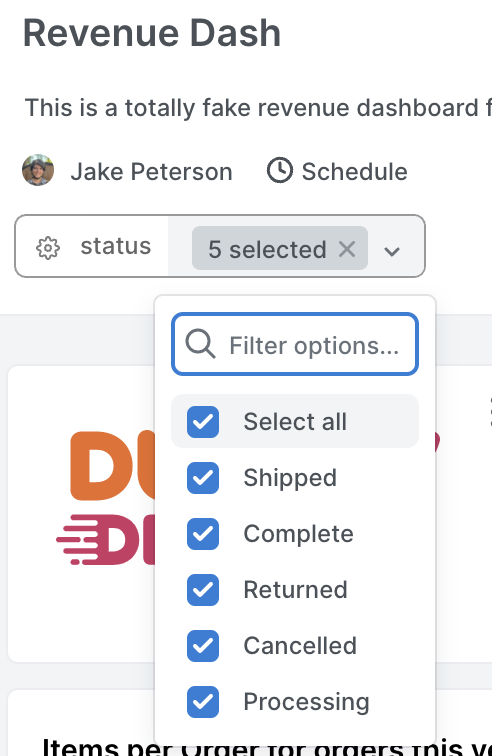
If you need to use different variables for different widgets, no problem! In each widget, there is a menu under each title to Edit variables. Editing a variable in a widget will override the variables at the top of the dashboard, and use the specified edit instead. If you want to revert to the global dashboard variables, all you have to do is click the reverse arrow. Refresh the dashboard after an update to see the changes you made.
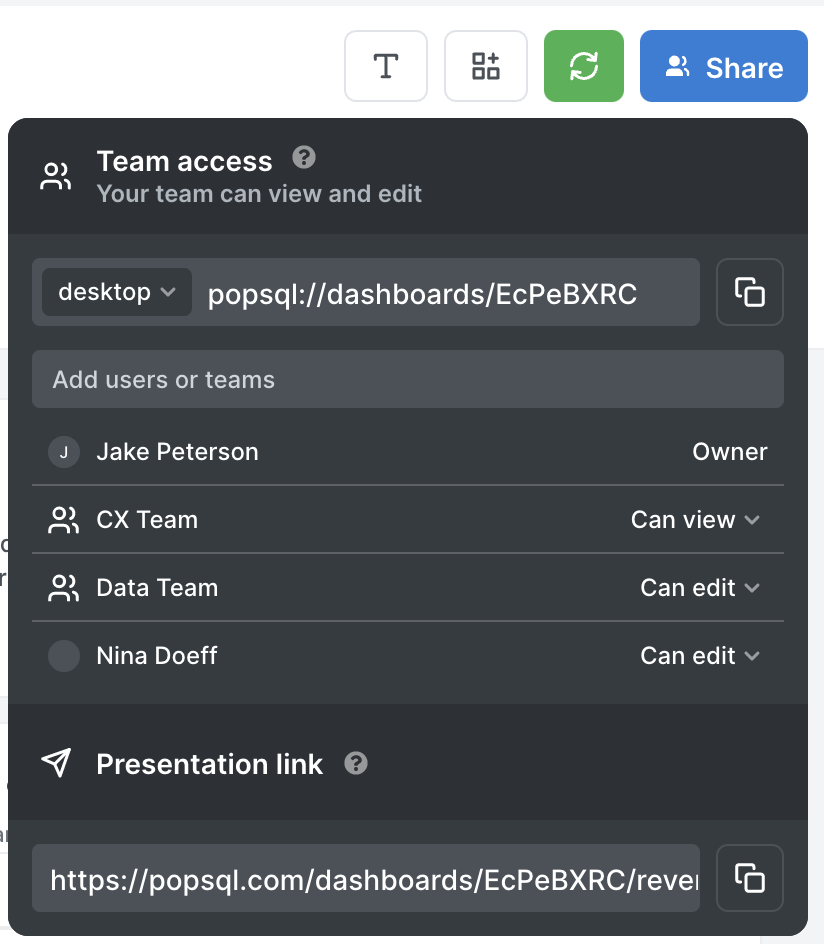
Sharing a dashboard
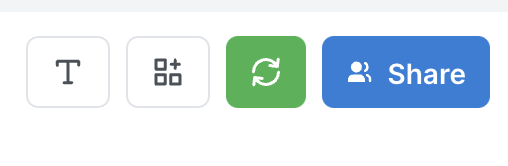
When you create a new dashboard under the private dashboards folder, you are the only person who is able to access it. If you create a dashboard under the shared dashboards folder, your team will be able to find and access the dashboard. When you're ready to move your private dashboard to shared, you can use the blue share button in the top right corner, or drag the dashboard into the shared folder.
You can control the permissions to view and edit in the top right corner of the screen by clicking the blue share button. There you will also find the presentation link to share the dashboard more widely. Using the presentation link, people can refresh the dashboard right from their browser, and they can change query variables like date ranges or customer IDs. Note that this requires a cloud connection.
On our enterprise plan, you can create granular permissions and specify exactly which people/teams can view or edit your dashboard.
Sharing and Private ConnectionsIf it happens that a query created with a private connection is added to a shared dashboard, the dashboard will not be able to be refreshed by anyone other than the connection owner successfully. They will see a
Connection access error. In order for shared dashboards to be refreshed by everyone, the connection needs to be shared as well.
Text and images
In addition to query result tables and charts you can add images and text widgets as well. These are great for explaining your analysis or creating sections within your dashboard. Text widgets use markdown formatting.
Most HTML won't work in text widgets for security purposes, but you can add a line break using <br>.
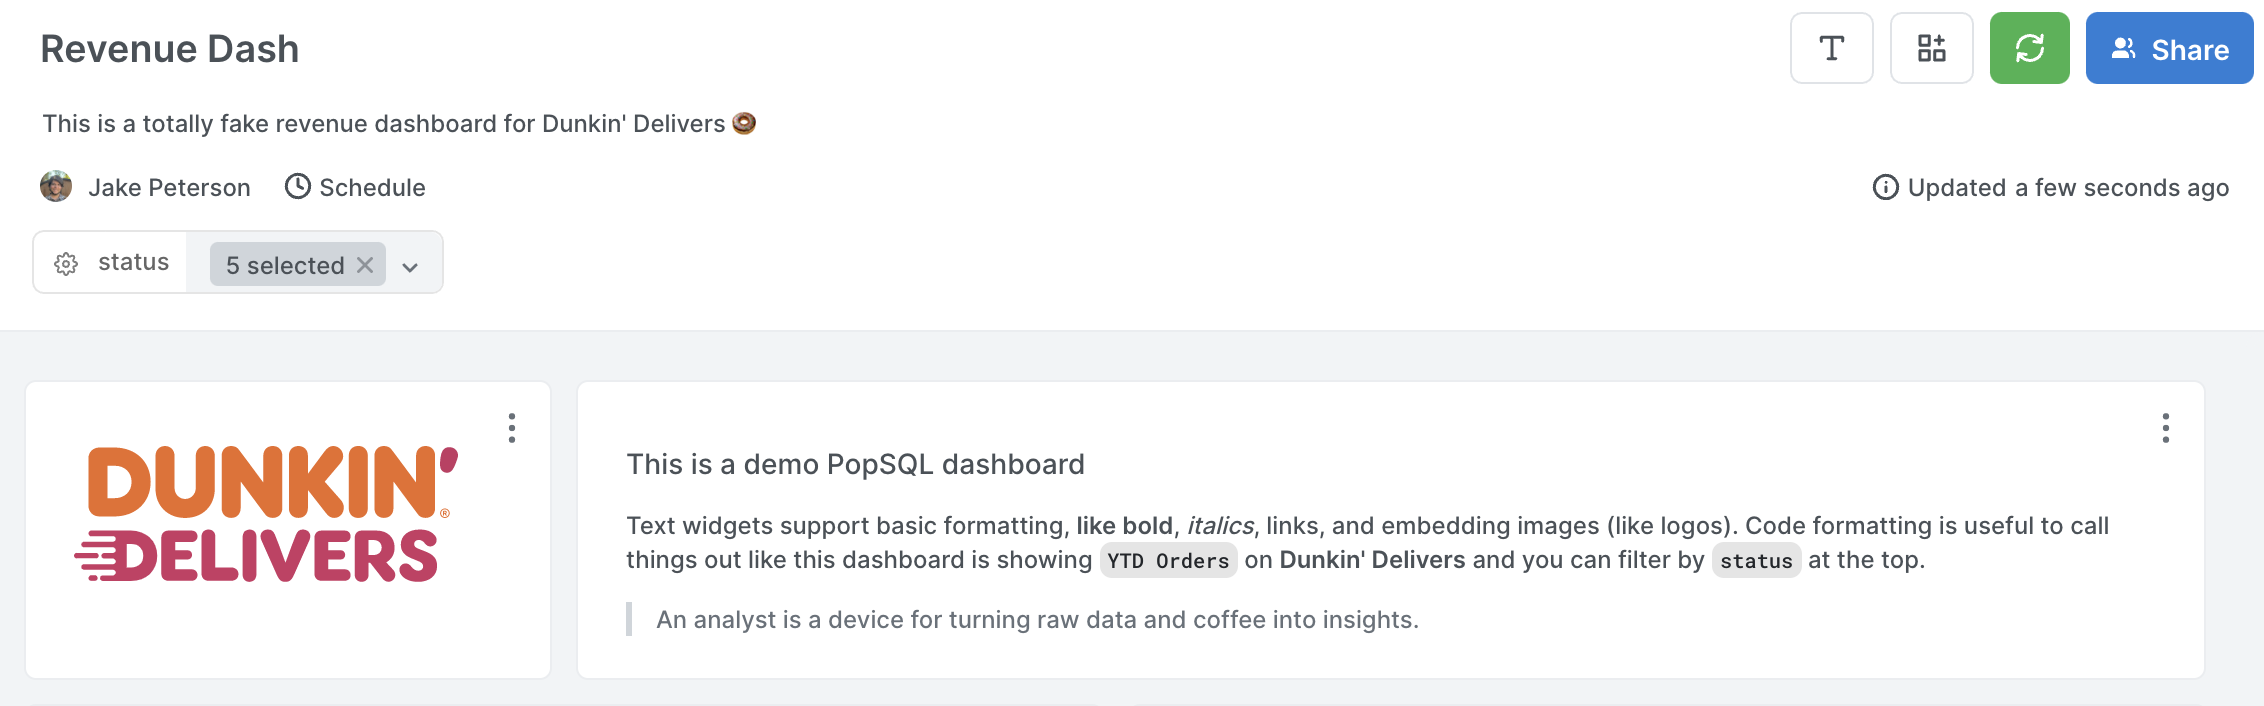
To add a text box click the T at the top right side of the page, drag it to the size of your liking and fill in your text.
To add an image to a dashboard first insert a text widget, then click on the image icon in the text menu. The markdown format for an image will pop up and all you need to do is insert the URL for your image where url is shown in parenthesis. You can add descriptive text in between the brackets, though it isn't necessary. Once the URL and text are ready to go, just click out of the text field and you will see your image in your dashboard.
Note: images can only come from public URLs. If you have an image in a file on your computer, upload it to your web browser so you can get a compatible link for the PopSQL dashboard.
Details
You can see information regarding the dashboard owner, the amount of dashboard usage, and the queries used to power the dashboard, click the i icon under the share button to see details. All of the queries listed are links that you can click that will take you back to the query page.
Refreshing
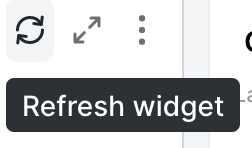
You can refresh all the widgets in the dashboard with the green button in the top right corner, or refresh widgets individually using the circular arrowns on the top right of each widget.
Scheduling a dashboard to auto refresh
You can schedule a dashboard to auto refresh by clicking the Schedules button under the title and description. Optionally, you can configure PopSQL to send a Slack message or an email whenever the dashboard refreshes under the notifications tab. Note: you must use a cloud connection to use this feature.
Note: if you have a limit of 2 dashboards on Free or Premium plans you will not be able to create new dashboards after there are 2 that exist in your organization. If you previously had more, they will continue to be functional.
Updated 10 months ago