Schedule Approval
With the schedule approval workflow editors will need an admin of the organization to approve a schedule before it starts running. Once the schedule is approved it will run as intended and notify users through the specified channels of email or Slack.
This feature is available on our Enterprise plan. Please contact us if you're interested in learning more or trialing the integration.
To turn on this feature, navigate to your preferences, then organization settings, and enable Restrict scheduled queries:

Setting up the schedule
On the editor side, creating a schedule looks basically the same as it would without the approval process, with a small addition.
To set up the schedule, under the query or dashboard title there is a clock icon that says Schedule. When you click, a window will pop up where you can input the information for the schedule.
Add a descriptive name and specify the cadence with which the schedule should run. The example below shows a weekly report, but it could be hourly, daily, monthly, or just once. After the frequency has been defined, add an optional message to the admins about the purpose of the schedule.
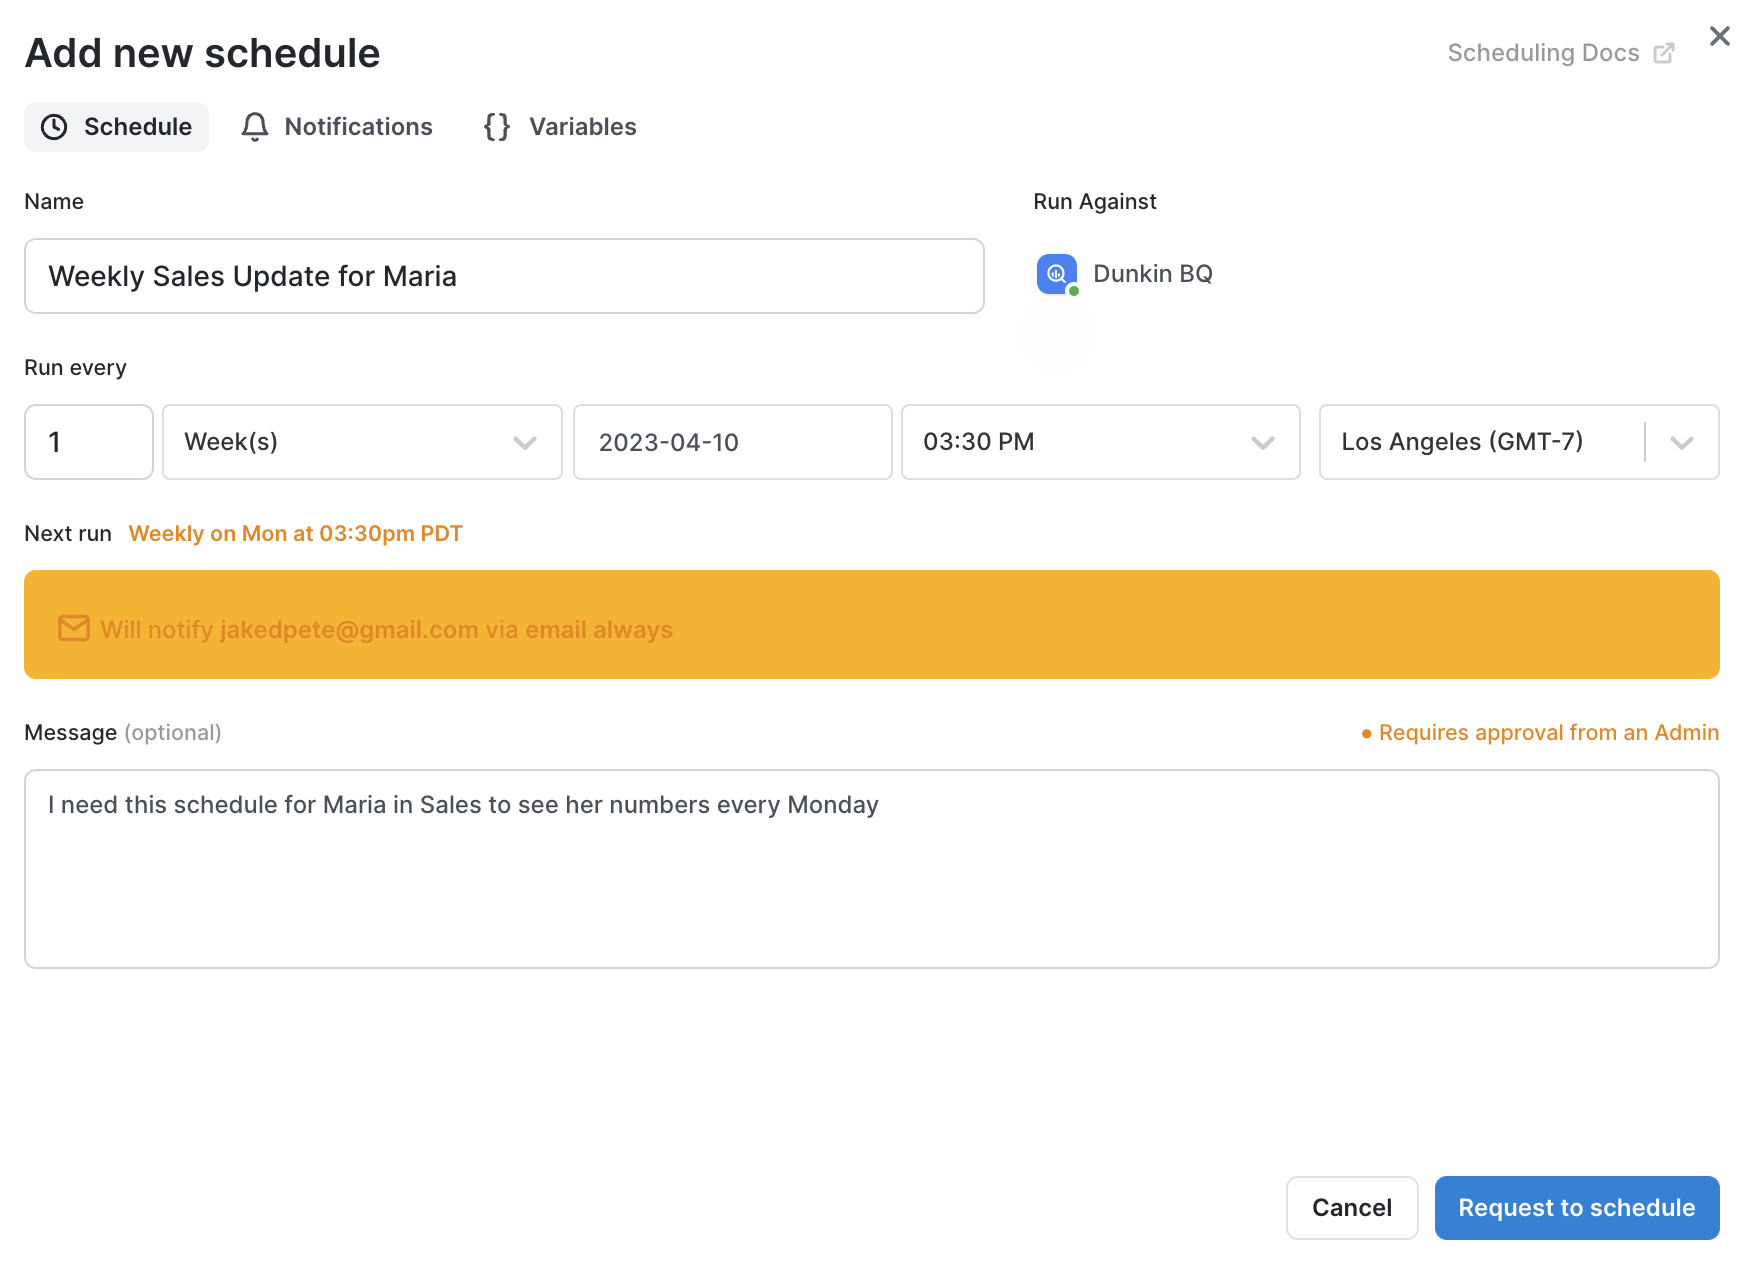
After the schedule information has been defined, click over to the Notifications tab to specify where the schedule should be sent. The default will be an email to you, but you can add other emails or specify Slack channels or direct Slack messages as well. You can also set up preferences for the conditions for notification:
- Always: Every time the query runs, we'll send a notification.
- If there are results: If there are one or more rows returned, we'll send a notification.
- If there are no results: If there are zero rows returned, we'll send a notification.
- Never: The schedule will run the query, but you will not be notified.
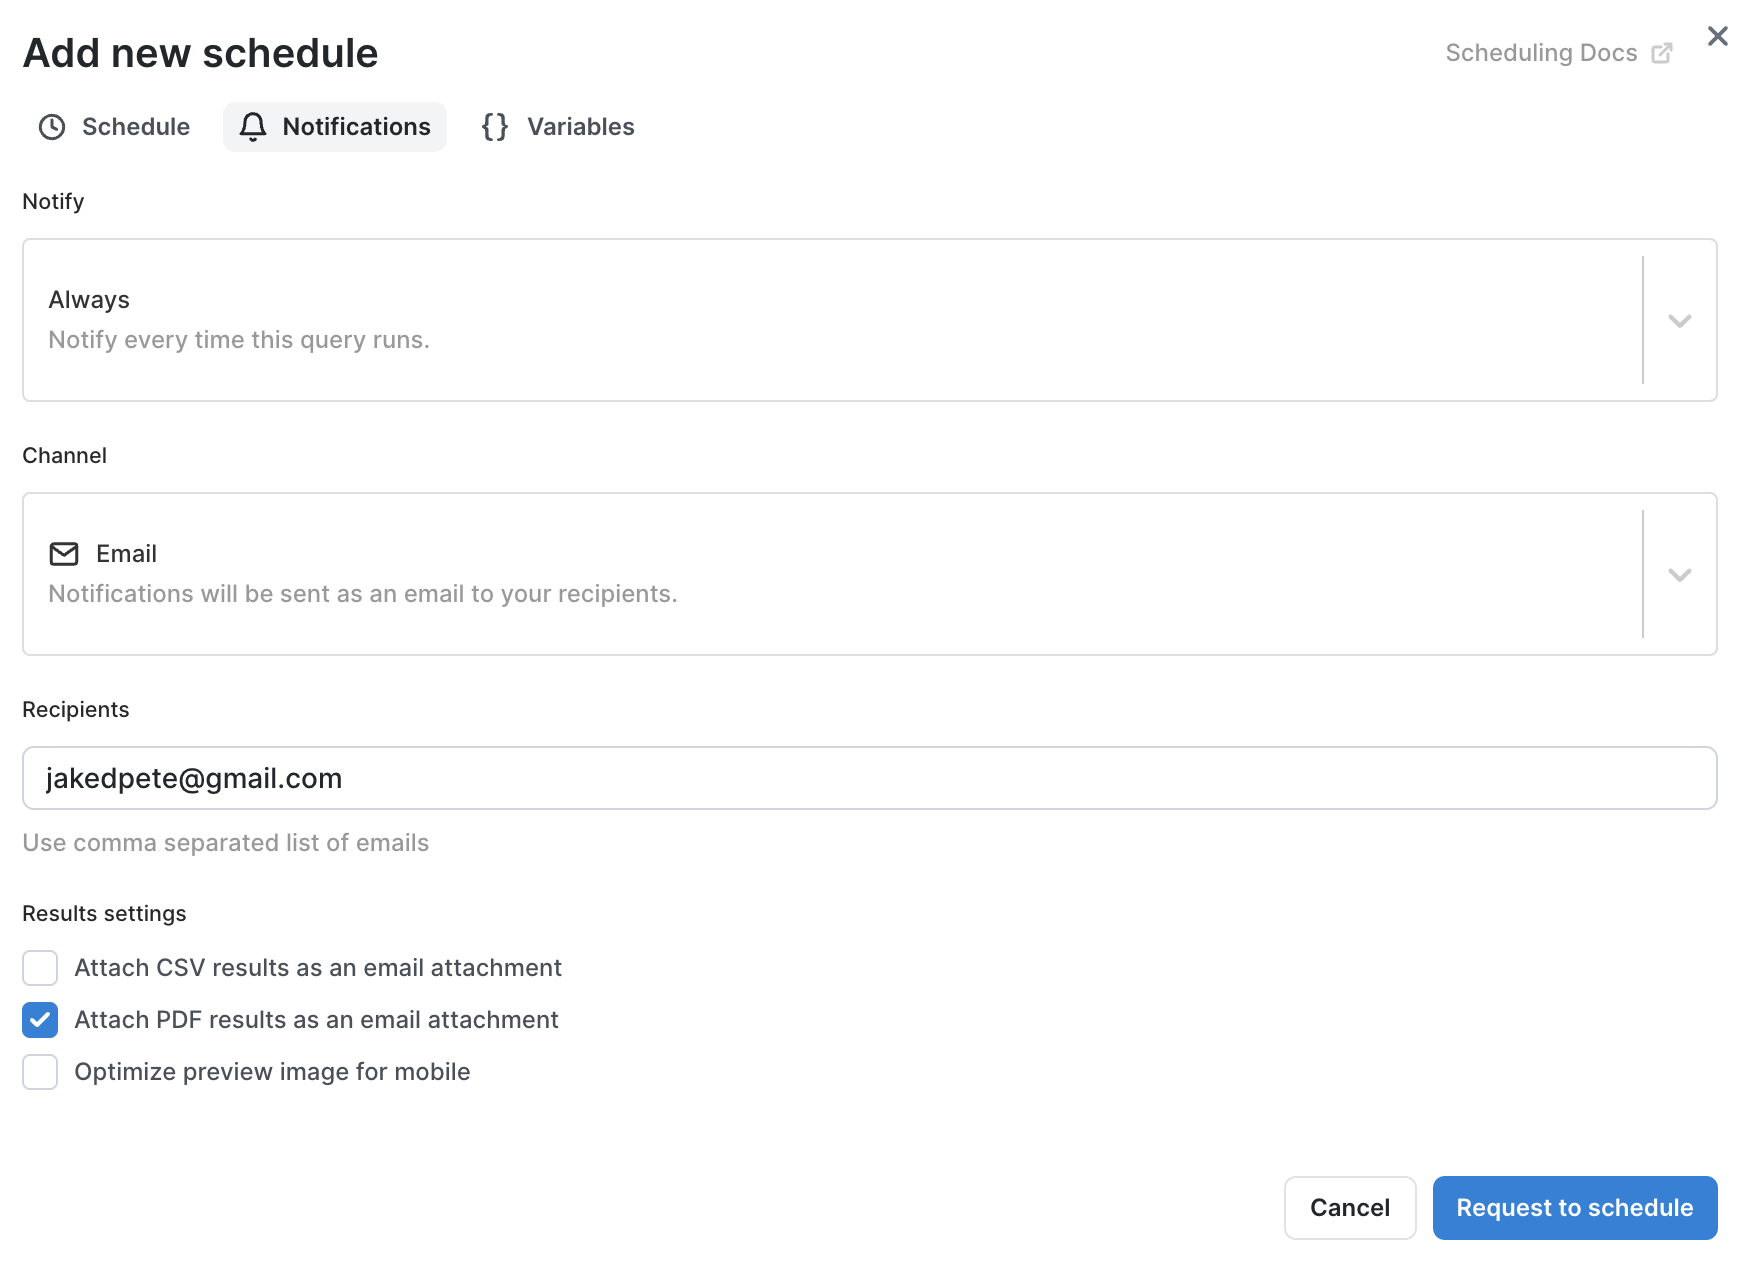
Finally, add results settings if you'd like a CSV or PDF attachment, or a mobile optimized preview.
In the final tab, manage the query variables if applicable. See how to deal with scheduled variables here.
To send the schedule in for approval click the blue Request to schedule button. You'll see confirmation and the admins will be able to approve or deny the request (see below).
Note: admins will not be notified of schedules to approve, and editors will not be notified that it's been approved. Make sure to contact and admin if you need a schedule approved.
Admin Approval
As an admin, head to the preferences page, then to Schedules.

Once there, you'll see a tab: Pending approval

There you'll see the dashboards and query schedule requests that you need to approve or deny. This is the same view for all admins within an organization.
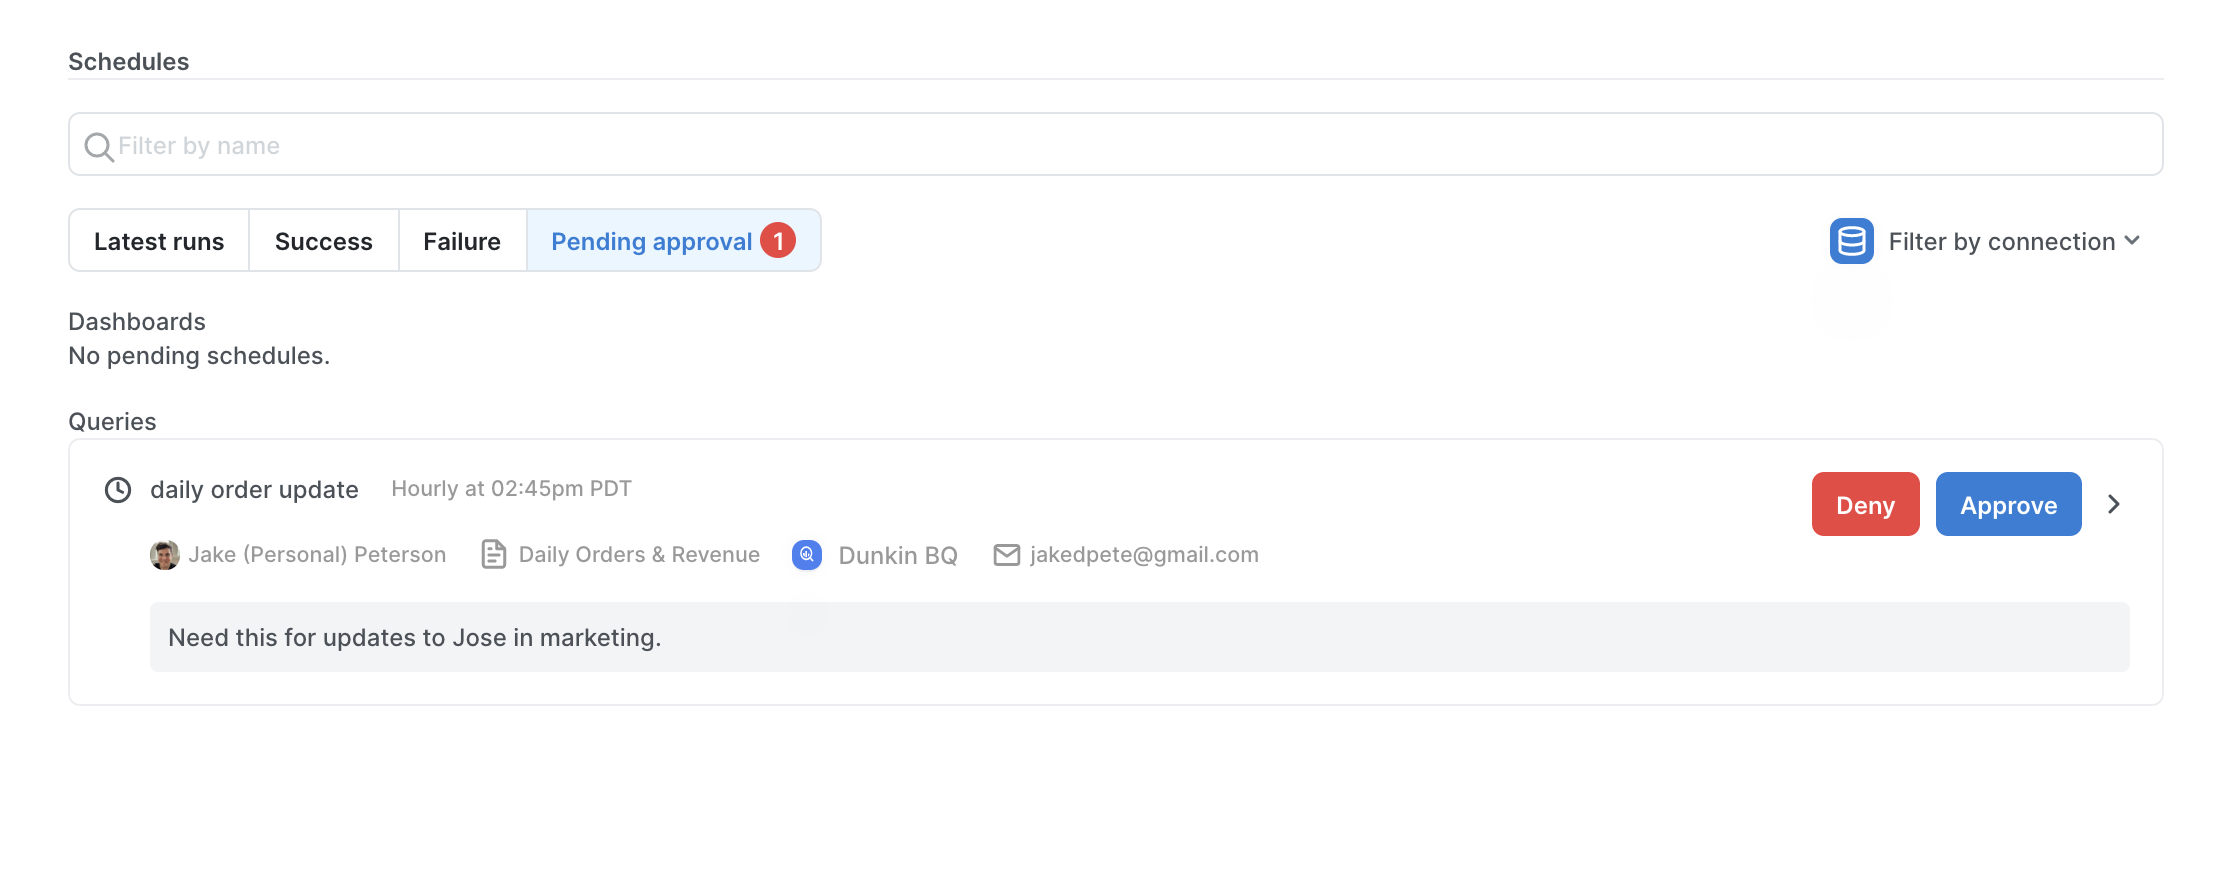
If you need more information, clicking anywhere within the box will link you to the query or dashboard so you can inspect, run it, or see any recent changes in the version history.
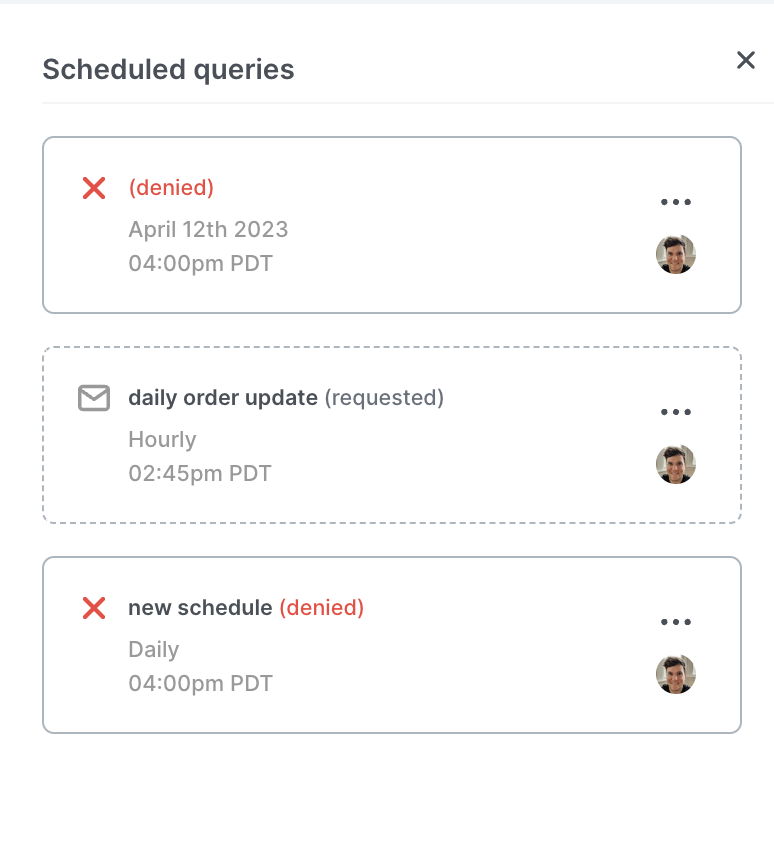
By clicking Approve the schedule will immediately go into effect and will run at the next specified time. If you click Deny the schedule will not run and in the schedule window within the query it will show that it has been denied. Either way, the request will disappear from the Pending approval tab.
Editing a schedule
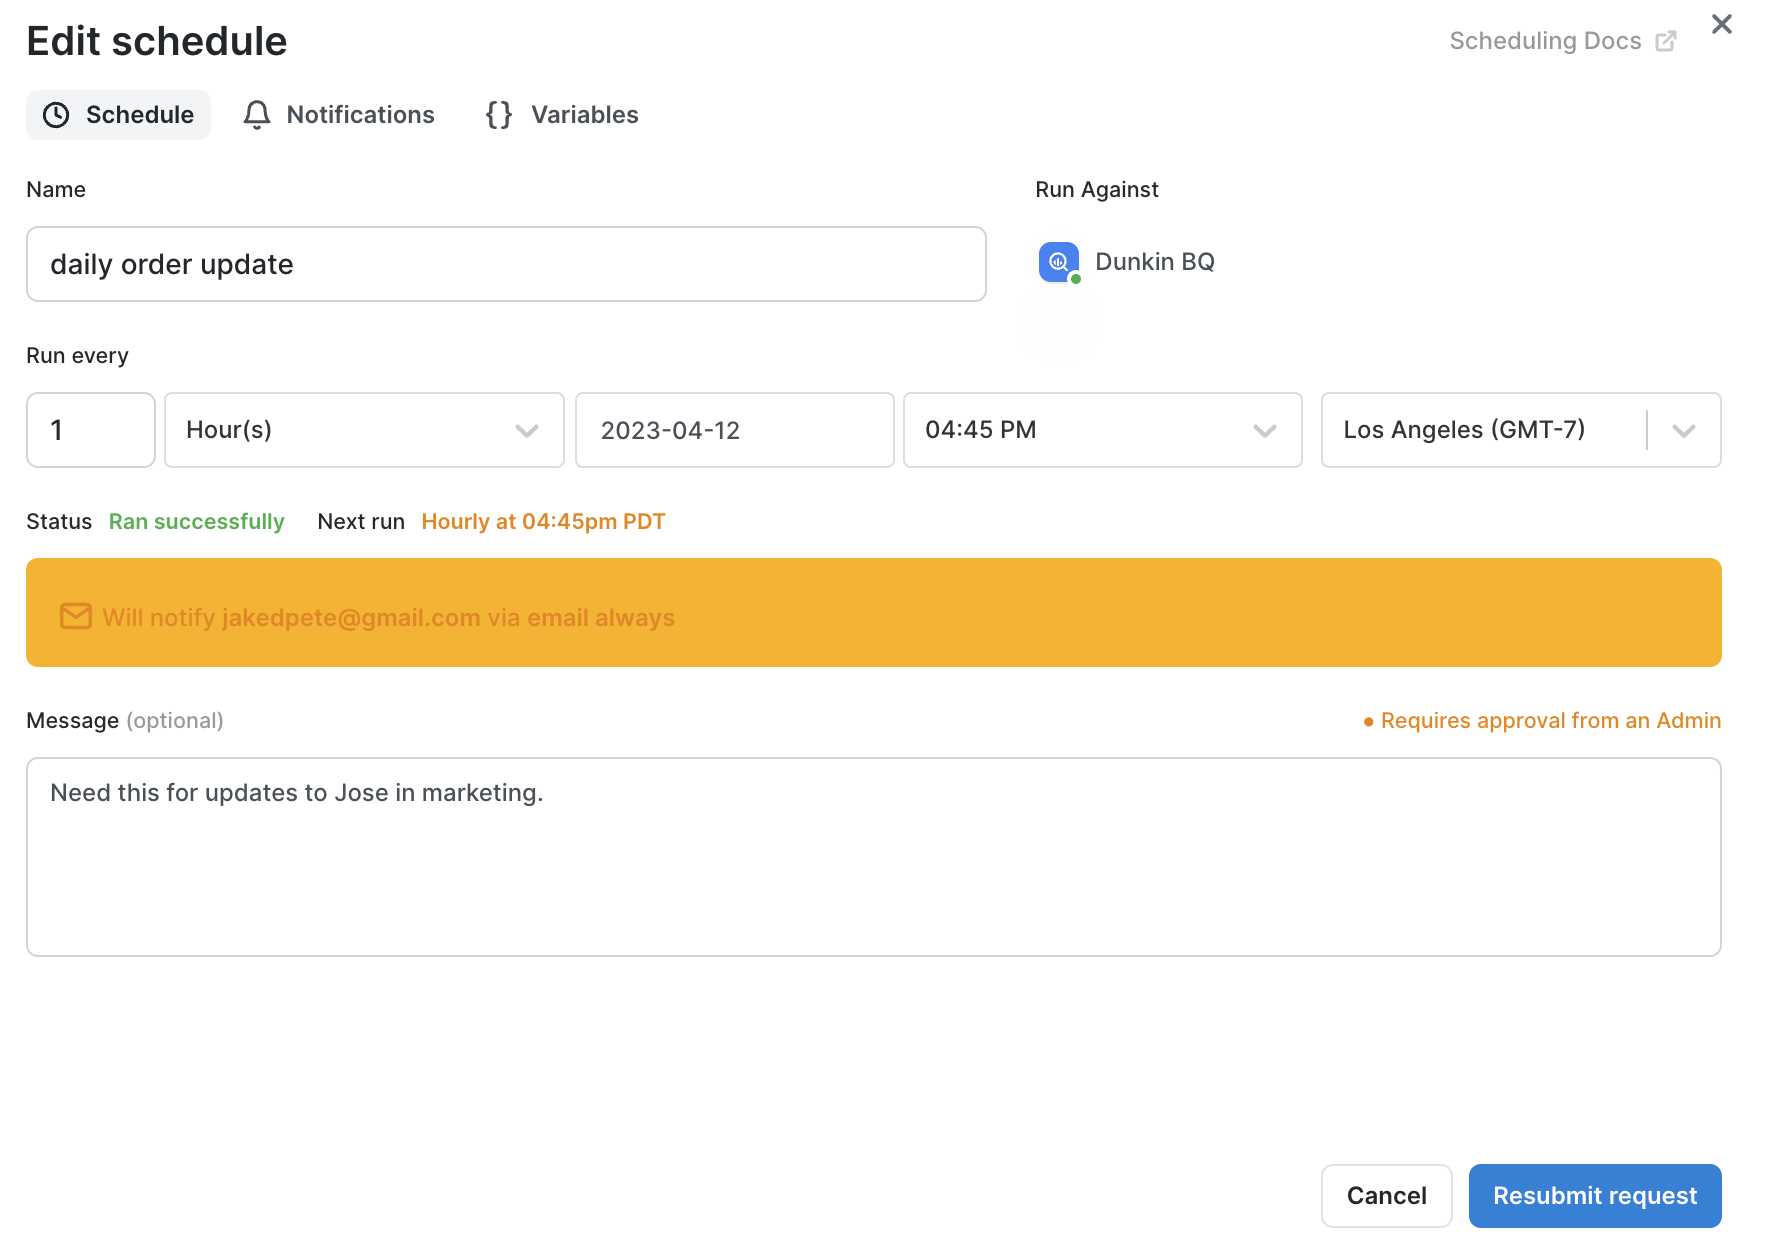
If an editor needs to make changes to a schedule that's already been approved, the changes will need to be approved as well. To make the change, go to the query or dashboard, click the Schedules button and select the schedule from the side bar that pops out.
From here, make the necessary edits and then click Resubmit request. Note: in the time between the edit request and the approval, the old schedule will not continue to run. After the edit has been approved, the schedule will begin to run again with the updated parameters.
Editing a query with an approved schedule
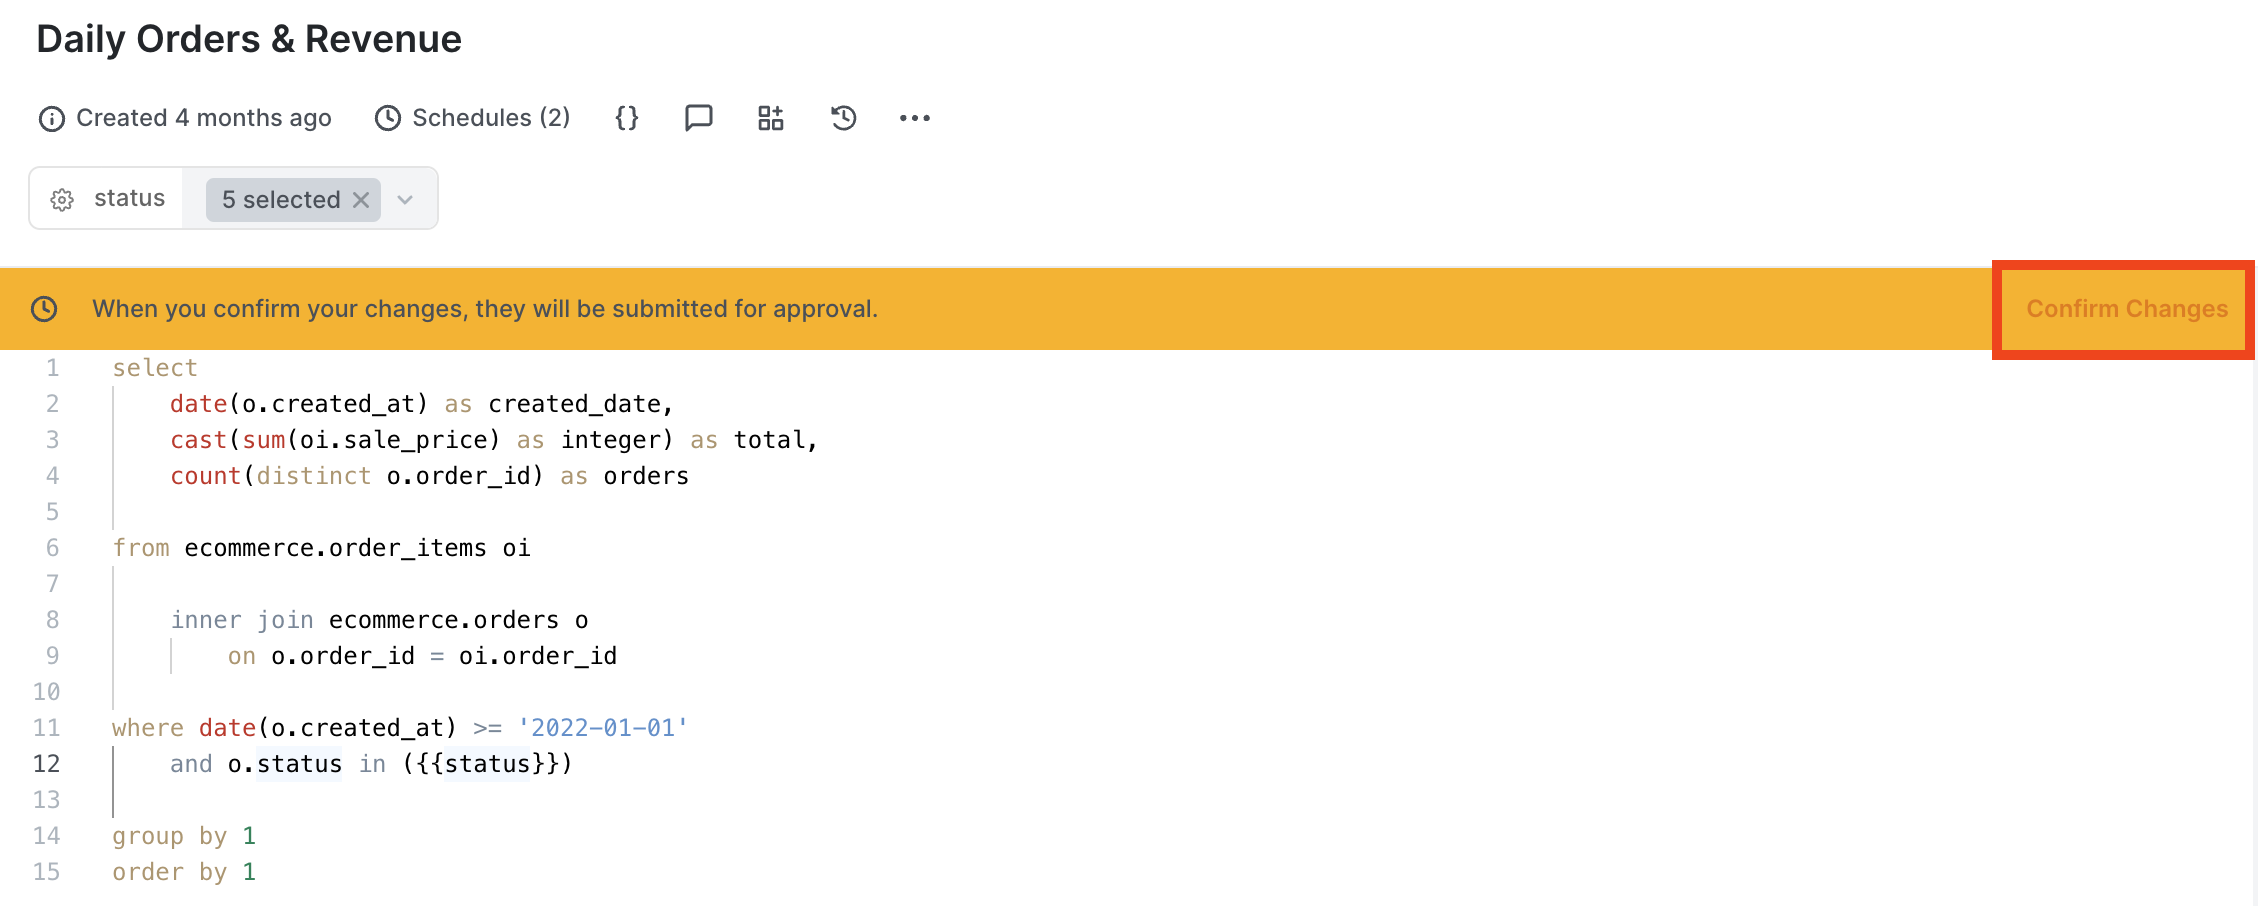
If an editor needs to make a change to a query that has a schedule that's been approved, the changes will need to be approved as well. When they click into the editor to make the change they'll be met with this warning, and upon clicking Confirm changes can be made.

After making the necessary changes, the editor will click Confirm Changes on the right side of the orange bar. This will confirm the edits and send the query to the Pending approvals tab on the admin's schedule page.
The admin will see a message in the Pending approval tab that the schedule needs to be approved again because the query was updated. The admin can click into the query and review the changes through the version historyand approve. Once they approve, the updated query will run on the predetermined schedule.

Updated 5 months ago
